


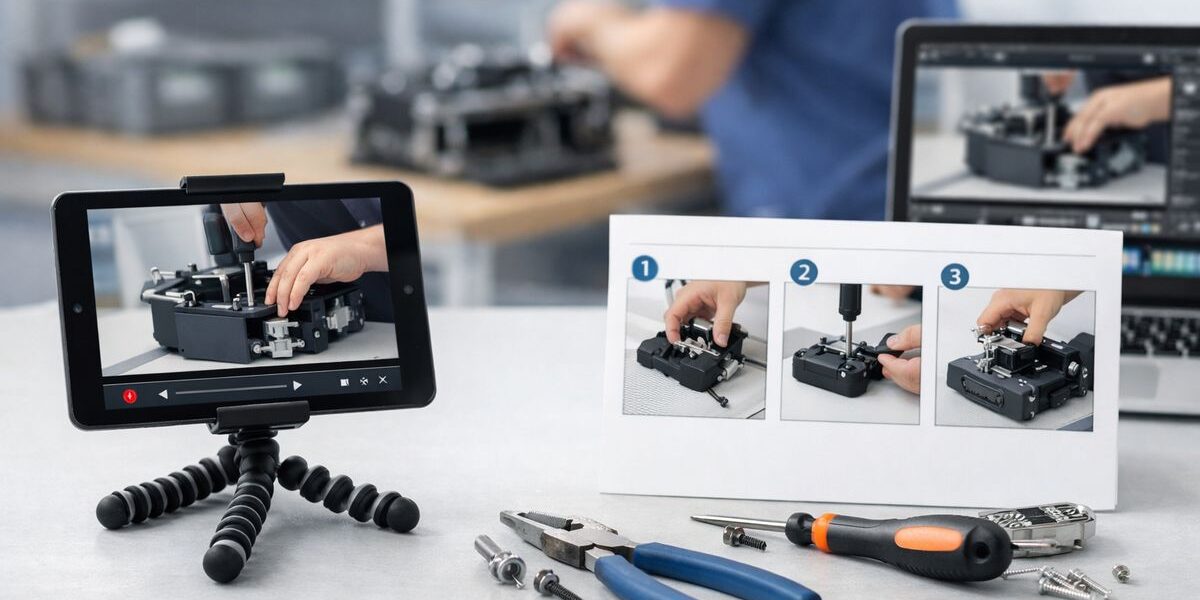
You already have the video. That part felt like the hard part. But turning footage into assembly work instructions people can actually follow on the floor is where most teams get stuck, because a recording of work is not the same thing as a usable standard. This tutorial gives you a practical way to go from video to reviewed, shop-floor-ready steps with AI doing the draft work and humans doing the judgment.
What this tutorial will help you do
By the end of this process, you will have a repeatable way to turn one assembly recording into a first version of work instructions that operators can use, supervisors can trust, and engineering can revise without chaos.
That matters because the gap is not really “we need more content.” The gap is structure. Video captures motion. Good instructions capture intent, sequence, checks, and conditions. AI is very good at speeding up the first pass, especially if you already have recordings or are planning a faster way to document work on video. It is not good at knowing which shortcut in the footage is approved and which one is just what somebody did on a busy Tuesday.
What you’ll need before you start
Before Step 1, gather the minimum inputs so the project does not stall halfway through. Most failed attempts start with decent video and missing context.
Source video of the assembly process
Use footage that shows one complete run of the task from start to finish. Stable camera angle, clear view of hands, tools, and parts, and no mystery jump cuts. One clean recording beats five partial clips every time.
Try to capture what the operator actually sees. If the task depends on part orientation, connector alignment, tool angle, or where a label lands, the camera needs to show that. If the lens is too far back, AI will happily produce vague nonsense from vague footage.
A known standard for the job
You need the current best-known method for the task, even if it lives across SOPs, quality notes, torque specs, engineering docs, or a tribal-memory spreadsheet someone swears is up to date.
“Standard work” just means the agreed way the task should be done right now. Not last quarter. Not the workaround from third shift. Right now. That standard gives you something to compare the video against when the footage and the approved method do not perfectly match, which they often do not.
A subject matter reviewer
Pick one operator, trainer, or manufacturing engineer who knows the job well and can review the draft. AI can pull a sequence quickly, but it cannot tell when a hand pauses because the part is seating correctly or because the operator got distracted.
This person keeps bad assumptions out of the final document. They also catch the hidden context that never shows up cleanly on camera.
Your AI and documentation setup
Keep the stack simple. You need a way to transcribe audio or analyze video, a work instruction template, a storage location, and a review path. That is enough to start.
Do not turn this into a software shopping trip. Use what you already have, then tighten the workflow later. If you are sorting out systems across quality, MES, document control, and training, it helps to think through what to check before connecting manufacturing tools so your new process does not get trapped in approval limbo.
Step 1: Pick one assembly task worth documenting first
Start small. A narrow pilot teaches you more than a grand rollout plan ever will.
- Choose one task that is easy to see on video, repeated often, and painful enough that better instructions would matter.
- Keep the scope to one station, one subassembly, or one inspection sequence.
- Write down the business reason for choosing it before you touch the footage.
If you skip this and try to document an entire line at once, you will spend more time arguing about boundaries than improving instructions.
Choose a task with a clear start and finish
Pick something bounded, like fastening a subassembly, loading a fixture, routing a cable harness, or completing a final inspection pattern. The beginning and end should be obvious.
That matters because fuzzy process boundaries create fuzzy documents. “Assemble Unit A” is too broad. “Install bracket, torque two fasteners, and verify connector lock” is much better.
Avoid the worst first candidates
Skip highly variable rework, weird low-volume exceptions, and tasks split across multiple stations with constant handoffs. Those are worth documenting later, but they are bad pilots.
The trick is to prove the method on stable work first. You want a process where the sequence is mostly the sequence, not a choose-your-own-adventure based on defects, shortages, or custom options.
Set the success criteria
Define what success means before you generate a draft. Faster authoring time is one option. Fewer operator clarification questions is another. Shorter training ramp, cleaner revisions, and fewer line-side workarounds also count.
Write down two or three measures and keep them practical. If the pilot saves three hours of authoring time but operators still ignore the document, that is not a win. If you need a broader frame for where this fits, using AI to improve factory instructions is really about usability and control, not just faster content creation.
Step 2: Capture or clean up the video so AI can read it
Most downstream problems start here. Bad input creates bad drafts, and the AI gets blamed for footage that never had a fair shot.
- Review the video once without generating anything.
- Check visibility, audio, completeness, and pace.
- Clean the file before sending it through AI.
A little prep here saves a lot of editing later.
Record the task from the best angle
Position the camera so the task is readable. You want part orientation, tool use, operator hand movement, and completed results in frame as much as possible.
A useful video shows what matters, not just that someone stood at the station. Overhead or slight over-shoulder views often work better than a wide room shot. If you cannot tell whether the connector fully seated, neither can the model.
Include audio or a short operator walkthrough
Audio adds context you will not get from motion alone. An operator saying “listen for the click” or “make sure the tab sits flush before torque” can save you from a weak draft later.
That hidden know-how is implicit knowledge, which is just the stuff experienced operators do without spelling it out. I have seen one quiet five-second comment fix more confusion than ten extra screenshots.
Remove dead time and distractions
Trim out waiting for material, side conversations, off-task motion, and long pauses. Keep the work, lose the noise.
This helps the AI map actual actions instead of mistaking downtime for steps. It also makes review faster, because your subject matter expert is not scrubbing through irrelevant footage to find one key moment.
Split long processes into logical segments
If the task runs long, break it into chunks by station, tool change, assembly phase, or inspection point. Do that before generating instructions.
Like sorting groceries before putting them away, this makes the next part much easier. The AI performs better when each clip covers a coherent sequence instead of fifteen minutes of mixed activity.
The All-in-One AI Platform for Orchestrating Business Operations
 Instantly create & manage your process Use AI to save time and move faster Connect your company’s data & business systems
Step 3: Pull the raw sequence from the video with AI
Now you want speed, not polish. The output here is a rough draft of the task flow.
- Run transcription if there is spoken audio.
- Ask the AI to list visible actions in order.
- Review the sequence for obvious misses before turning it into formal instructions.
Think of this as extracting the skeleton.
Generate a transcript and action list
Have the AI capture both spoken guidance and visible actions: pick, place, align, fasten, scan, inspect, confirm. Ask for a numbered sequence, not a paragraph summary.
That output gives you a first map of the work. It will usually over-compress some parts and over-explain others, which is fine. You are not looking for release quality yet.
Identify tools, parts, and checkpoints
Next, attach the right nouns to the right actions. Replace “install part” with the actual component name. Replace “use tool” with the torque driver, fixture, scanner, or gauge involved.
This is where generic text becomes usable floor language. Pull names from the video, BOM, SOP, and station docs so the draft reflects the real job rather than sounding like a robot watched a person touch objects.
Flag uncertain moments for review
Mark anything the AI cannot clearly support: blocked camera view, motion too fast to parse, action based on feel, hidden check, or unclear part handoff.
Do not let the system guess through ambiguity. Bad assembly work instructions often start with fake confidence. A flagged uncertainty is healthy because it tells the reviewer exactly where human judgment is needed.
Step 4: Turn the raw sequence into real assembly work instructions
Here is the big shift. A transcript records events. A work instruction tells someone how to do the job correctly.
- Rewrite each draft line as an operator-facing action.
- Check the order against real work flow.
- Add checks, warnings, and format rules.
This is where the document starts becoming useful.
Write each step as one clear action
Keep each step to one action whenever possible. “Place bracket on fixture” is clean. “Place bracket, align holes, hold cable aside, and start both screws” is too much.
Good steps also show what done right looks like. “Seat connector until lock tab clicks” is stronger than “connect cable.” That visible or audible outcome matters, especially for training and consistency.
Put steps in the order work actually happens
The video sequence is not always the best instruction sequence. Maybe the operator paused to reach for a part, talked to someone, or did a check late because the camera operator asked a question.
Your job is to shape the draft into the order that makes sense on the line. Reorder, merge, or split steps based on actual operator flow. If you are modernizing a bigger instruction system, this is the same discipline behind upgrading how teams create and maintain instructions, just applied to one task.
Add warnings, cautions, and quality checks
Place safety notes where the risk happens, not in a giant warning block nobody reads. Add quality checks right after the action they verify.
“Critical-to-quality” simply means the points where one small miss creates a bad build. Wrong torque, reversed part orientation, unreadable label, incomplete scan, missing adhesive, bad gap. These checks belong inside the flow, where they can actually prevent defects.
Use consistent wording and formatting
Pick standard verbs and stick to them. If one step says “install,” another says “insert,” and a third says “fit” for the same action, readers start wondering whether those mean different things.
Keep units consistent. Keep labels consistent. Keep image placement consistent. Familiar formatting reduces friction, especially across shifts and stations.
Step 5: Add visuals that make the steps easier to follow
Good visuals remove doubt fast. In many cases, they do more work than extra text.
- Identify the moments where operators usually ask, “Like this?”
- Pull an image or clip for those moments.
- Annotate only what helps the eye land in the right place.
Do not add visuals just because you can. Add them where they solve confusion.
Pull still frames from the video
Grab stills for key moments: correct part orientation, hand placement, connector position, torque point, pass/fail examples, and final assembled state.
Pick frames that answer a real question at a glance. If the image is blurry or wide, it will not help. Crop aggressively when needed.
Annotate the visuals
Use arrows, circles, labels, and zoom-ins to direct attention. Keep it simple. One image should usually highlight one point.
The trick is to guide the eye without building a cluttered map. If everything is highlighted, nothing is highlighted. A clean visual with one callout often beats a busy one with seven.
Decide when to use short clips instead of still images
Use short clips when movement matters. Cable routing, seal seating, hand sequence, tool angle, or confirming a latch engagement are good examples.
A five-second clip can clear up confusion that a static image never will. This is where using recorded steps on the floor for the right kinds of workflows becomes especially useful, because some jobs are simply easier to show than to describe.
Step 6: Fill in the context the video did not capture
Video shows the work. It usually does not show everything the operator needs to know before, during, and after the work.
- Add setup conditions.
- Add specs and references.
- Add short notes for common mistakes.
This is the gap many AI drafts miss.
Add prerequisites and setup conditions
State what must be true before the first step starts. PPE ready, parts available, fixture clear, software screen open, correct product variant loaded, barcode scanner active.
Without this context, the instruction starts in the middle of reality. Operators should not have to guess whether the station is ready or the process assumes earlier prep.
Add specs, limits, and references
Insert torque values, cure times, gap limits, label requirements, scan rules, inspection tolerances, drawing references, and part numbers where they belong.
This keeps the document tied to engineering reality instead of drifting into a vague summary. Put the values near the action they affect so the operator does not have to bounce between pages.
Capture tribal knowledge without turning steps into a novel
Add short tips where they prevent known mistakes. Keep them tight. “Notice the tab should sit flush before fastening” is useful. A six-line paragraph about every possible failure mode is not.
The main steps should stay lean. Supporting notes should earn their place.
Step 7: Review the draft with the people who do the work
If the people on the floor do not trust the instruction, the format does not matter. Review is not a formality. It is where the draft proves itself.
- Walk the draft at the actual station.
- Watch someone else follow it.
- Resolve conflicts between what was recorded and what is approved.
This step finds the truth fast.
Run a floor-level review
Have an operator and supervisor walk through the instruction against the actual station, tools, parts, and screens. Read each step and compare it to what really happens.
This is where awkward wording, missing setup conditions, hidden checks, and bad image choices show up almost immediately. The floor is honest.
Test whether a new person can follow it
Next, give the instruction to a learner or cross-trained operator. Watch where they hesitate, ask questions, or skip checks.
That is your checkpoint. If they need constant rescue, the document is not ready. This is also where stronger training that people will actually use on the floor starts, because good instructions reduce the gap between knowing and doing.
Fix conflicts between the video and the standard
Sometimes the recording shows a workaround, old sequence, or unofficial method that gets the job done but is not approved. Do not publish that by accident.
The catch is simple: video reflects reality, but your released instruction has to reflect approved reality. If the standard is wrong, fix the standard through the right owner. If the operator drifted, fix the draft.
Step 8: Format the instructions for the shop floor
Accurate is not enough. Operators need to scan the document under real production pressure.
- Choose the format that fits the station.
- Keep the layout easy to read quickly.
- Add revision and approval details.
Usability wins here.
Choose the right delivery format
Use printed sheets where screens are awkward, dirty, or slow to maintain. Use tablets or station displays when visuals update often or linked media matters. Use hybrid formats when the core steps should stay visible in print but clips are helpful for tricky motions.
Pick the format based on the actual conditions of the station: gloves, lighting, update frequency, available mounting space, and how operators work when the line is moving.
Keep the layout fast to scan
Use numbered steps, short lines, obvious image placement, and enough white space that the page does not feel like a policy memo. Put warnings and checks close to the action they support.
Operators should be able to find the next move in seconds. If they have to hunt through a wall of text, the layout failed even if the content is technically right.
Build in revision and approval fields
Include version number, effective date, approver, linked part or process ID, and document owner. Version control simply means knowing which copy is current and proving it.
Without these fields, old copies linger. Then people start building from whatever printout is taped nearest the bench.
Step 9: Publish, train, and roll out the first version
Now move from draft to live use, but keep the rollout controlled.
- Release to one area first.
- Show operators what changed.
- Set up a simple feedback path.
You want adoption, not confusion.
Release the instructions in one area first
Start with one station, one shift, or one product family. A limited rollout lets you catch issues without disrupting the full line.
This also gives you cleaner feedback. If something breaks, you know where and why instead of trying to untangle noise from a plant-wide launch.
Show operators what changed
Keep the intro short and practical. Show them where the visuals are, what the numbered format means, how to find revision info, and what changed from the old version.
Do not make this feel like homework. Frame it as a fix for pain they already know: easier to follow, faster to train, easier to update.
Set up a feedback loop
Give operators a simple way to flag unclear steps, weak images, wrong specs, or outdated sequence. QR code, form, shared inbox, marked-up print, whatever actually gets used.
If feedback has nowhere to go, the document will go stale fast. And if you are changing how instructions are created and maintained, the rollout usually works better when it is treated as a real update process for AI-driven documentation, not a one-time file drop.
Step 10: Improve the process so the next conversion is faster
One successful pilot is useful. A repeatable system is better.
- Save the prompt and template that worked.
- Build a small approved language library.
- Track what improved after rollout.
That is how this stops being a project and starts becoming a capability.
Create a reusable prompt and template set
Standardize the AI prompt, the instruction format, the review checklist, and the publish steps. Then reuse them.
You do not need a giant framework. A good prompt, a stable template, and a clear review path go a long way. This is where IT and manufacturing start getting repeatable value from the same workflow.
Build a library of approved phrases and visuals
Store common action verbs, warning formats, inspection language, annotation styles, and reusable visual examples. Keep them approved and easy to find.
Consistency helps operators move between products without re-learning how to read the document. It also speeds up authorship because people are not writing every step from scratch.
Track what improved after rollout
Measure practical outcomes: authoring time, review cycle time, training ramp, clarification questions, deviations, and revision turnaround.
The point is not to prove AI is exciting. The point is to see what actually got better and where the next conversion will pay off most.
Troubleshooting common issues when turning video into instructions
The first draft will have rough edges. That is normal. Most problems are fixable without starting over.
The AI missed steps or merged actions incorrectly
This usually happens when the clip is too broad, the camera angle hides transitions, or the prompt asks for a summary instead of discrete actions.
Go back and re-segment the video. Ask for one action per line. Mark hidden or uncertain moments explicitly. In most cases, the fix is tighter input and tighter structure.
The instructions are accurate but too wordy
Cut filler. Swap long phrases for direct verbs. Move background detail into notes or visuals.
If a step feels like an email, it needs editing. Operators need action and confirmation, not narration.
Operators say the instructions do not match real work
Investigate the source of the mismatch. Maybe the process drifted. Maybe the video captured a workaround. Maybe the standard is outdated.
Fix the ownership issue first. Then fix the document. Otherwise you will just polish the wrong version of reality.
Visuals are cluttered or not useful
Replace busy images with tighter crops, clearer frames, or short clips. Remove extra callouts.
If the reader cannot tell where to look in two seconds, the visual is not helping. Simpler almost always wins.
Revision control becomes messy fast
Set naming rules, approval ownership, archive handling, and one release location. Decide who can publish and who can only suggest edits.
Old versions should be archived, not left floating around in shared folders and on clipboards. Mystery copies spread fast.
What good looks like after you implement this
Good looks like this: your team can take a clean assembly video, produce a workable draft quickly, review it with the right people, and publish instructions that match approved reality without weeks of back-and-forth.
Operators get clearer guidance. Trainers get a better starting point. Engineers and supervisors get a document that is easier to revise because the structure is consistent and the visuals are tied to real work. And your bigger win is not “AI content.” It is a cleaner path into standardization, training, and better automation work that starts with clearer human tasks.
Try one task this week
Pick one bounded assembly task, ideally a repeatable station with a clear pain point. Record one clean run, split it into logical chunks, and turn just one chunk into a reviewed draft.
Try that this week, then share back what worked, what broke, and what you had to swap to make the method fit your floor.
The All-in-One AI Platform for Orchestrating Business Operations
Instantly create & manage your process Use AI to save time and move faster Connect your company’s data & business systems
